

Vibrant, crisp pickled radishes are delicious on tacos, salads, sandwiches, and avocado toast. They have just this incredible flavor that's absolutely addictive!

Table of Contents
I love making quick pickles, and this quick pickled radish recipe is my latest pickling experiment.
Now that the weather is cooling off, the availability of super fresh veggies for pickling is dwindling a bit, but you can find great, fresh radishes in both spring and fall!
For these photos, I'm using regular red radishes, but you can use your favorite variety of radish, like watermelon radishes, breakfast radishes, or even daikon with this flavorful brine.

For this brine, I'm using a combination of black peppercorns, coriander seeds, garlic, and lemon zest. They work well with the flavor of the radishes to make a pickle that I can't stop eating!
This is a quick pickle recipe, also called a refrigerator pickle. Like the name implies, you store these pickled radishes in the refrigerator. Quick pickles are not shelf stable. They will keep for two to three weeks in the fridge.
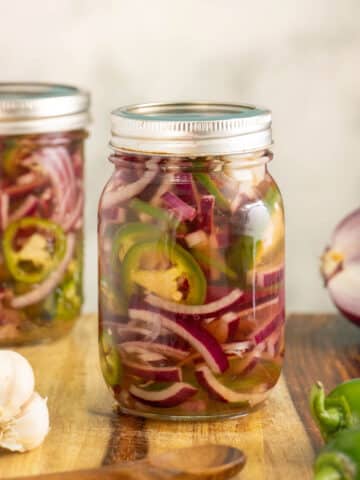
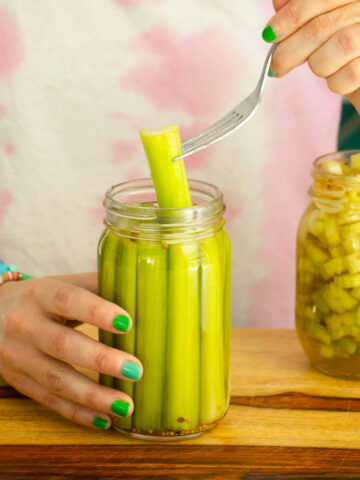
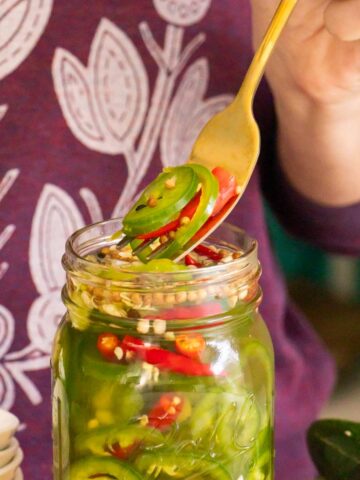
If you love making quick pickles at home, also check out my other homemade pickle recipes, like sweet pickled onions, crunchy cucumber pickles, pickled peppers, quick pickled celery and quick pickled carrots!

💖 Why You'll Love Pickled Radishes
- simple, delicious way to preserve fall's radish bounty!
- easy to make in about 20 minutes
- perfect topping for tacos, sandwiches, salads, and more!

✓ Ingredients and Substitutions
- radishes - I am using red radishes here, but feel free to use whatever radishes you have on hand that need preserving.
- vinegar - You can use apple cider vinegar or white vinegar as the base for your pickling brine.
- sugar - The sweetness balances out the sharp flavor from the radishes.
- whole spices - Black peppercorns and coriander seeds add a ton of flavor to these pickles!
- garlic - Because garlic makes things delicious!
- lemon zest - You can omit the lemon zest, but it really brings a great flavor to these pickled radishes! Instead of grating the zest, you are going to use a vegetable peeler or paring knife to slice of one, thin strip from a fresh lemon.
🔪 How to Make Quick Pickled Radishes
Wash the radishes well, trim off the tops and bottoms, then slice them thinly. Stuff the radish slices into a heatproof pint jar.

Combine all of the remaining ingredients in a small saucepan, and bring to a boil on high heat. Reduce the heat and stir until all of the salt and sugar dissolves.


Immediately pour the hot brine over the radishes. Then, let the jars cool, either uncovered or loosely covered. Once they're cool enough to handle, you can transfer them to the refrigerator.

💡 Helpful Tips
- The more thinly you slice your radishes, the more flavorful your pickles will be.
- You can use a regular pint jar for this recipe, but it's much easier to pour the brine in if you use a wide mouth jar. Whatever jar you use, make sure it's heatproof, so the hot brine won't cause it to shatter.
- The flavor of your pickled radishes will deepen with time. They'll taste delicious today, but tomorrow, they'll taste amazing. In a week? Mind blowing! 🤯
🫙 Storage Directions
Store your quick pickled radishes in the refrigerator for two to three weeks. Do not store them in the pantry.


📖 Recipe

Quick Pickled Radishes
Equipment
- Pint Jar - ideally wide mouth, but you can use regular, just pour carefully!
Ingredients
- 8 to 10 medium radishes
- ½ cup white vinegar or apple cider vinegar
- ½ cup water
- 2 tablespoons sugar
- 1 teaspoon salt
- ½ teaspoon whole black peppercorns
- ½ teaspoon coriander seeds
- 1 garlic clove lightly crushed
- 1 strip lemon zest
Instructions
- Wash the radishes well, trim off the tops and bottoms, then slice them thinly. Stuff the radish slices into a heatproof pint jar.
- Combine all of the remaining ingredients in a small saucepan, and bring to a boil on high heat. Reduce the heat and stir until all of the salt and sugar dissolves.
- Immediately pour the hot brine over the radishes. Then, let the jars cool, either uncovered or loosely covered. Once they're cool enough to handle, you can transfer them to the refrigerator.

Got a question? Tried this recipe? Leave a reply!